

Looking for a fun and new milk alternative? My go-to is usually Hemp Mylk but now that it is NUT season here on Vancouver Island, I figured I would share a few of my other favourites… like hazelnut, because they are arguably my favourite nut and we even have a local grower here on the island!
However, it is not a very fun time to be a hazelnut tree in B.C.. Unfortunately a fungus has been decimating hazelnut orchards throughout B.C. for several years, and sadly has reached the Cowichan Valley more recently in 2019. Eastern filbert blight was discovered in B.C. back in 2003 and spread to Vancouver Island in 2015. Luckily, the provincial Ministry of Agriculture is taking steps to help growers battle it; which is why we need to be supporting our local farmers that much more when given the option to!
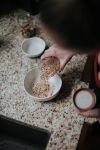
Okay now to the happier stuff- like the fact that it only takes TWO ingredients and a blender to make delicious nut mylks! Plus, there’s endless options with taste, variety, flavouring and even colouring.. see some fun ways below! But first, let’s talk about a few HEALTH BENEFITS with Nuts & Seeds:
-
- Essential Fatty Acids (EFA’s) – nuts and seeds are generally LOADED with omega oils and are usually higher in omega-6 than omega-3, which is awesome considering most of us get more 3’s than 6’s! EFA’s are essential for every function in our body but specifically helps the cardiovascular system, neurological function, nervous system regulation, immunity and so much more.
- REDUCE INFLAMMATION – due to the high amounts of healthy omega oils, vitamins and minerals, nuts and seeds that are whole and left raw can be great at assisting the body in reducing overall inflammation
- PROTEIN – nuts and seeds can also be a great source of protein for those that are looking for more plant-based protein alternatives
- NUTRIENT DENSE – nuts and seeds are also super nutrient dense; which makes sense seeing as they hold a lot of power in such a small package! Everything you need to grow things… meaning they’re SUPER high in vitamins, minerals, fats, proteins and FIBRE.
- QUALITY > QUANTITY – yes, these little guys are POWERFUL but it’s important to choose quality over quantity to ensure optimal health benefits! Because they are high in Omega 6, they can go rancid fast. Keep the ingredients (and this whole recipe) natural and raw when possible. Look for whole, raw (not toasted or salted) and locally sourced and when buying from the store check the REFRIGERATOR section as most nuts should be refrigerated!

INGREDIENTS
-
- 1/2 – 1 cup organic raw whole nuts, seeds or OATS! (this will depend on how “thick” and “creamy” you would like it – see notes below)
- My favourites to use on their own: Hazelnuts, Almonds, Cashews or Hemp Hearts
- My favourites to add to the above or blend all together: Macadamia, Brazil, Pumpkin and Sunflower seeds
- Use Oats or Coconut flakes if you have any nut/seed allergies or to bring the cost down.
- 4 cups filtered water
- 1/2 – 1 cup organic raw whole nuts, seeds or OATS! (this will depend on how “thick” and “creamy” you would like it – see notes below)
OPTIONAL (but highly recommended)
-
- 1-2 pitted medjool dates, softened in warm water (as a sweetener and slight thickener – you could also use maple syrup or honey)
- 1 tsp vanilla extract
- 1/2 tsp Himalayan salt
- 1/4 tsp xanthan gum
- 1 drop DoTERRA essential oil of choice
FLAVOUR OPTIONS
-
- plain/vanilla
- chocolate/cacao
- strawberry/beetroot
- golden mylk/turmeric + black pepper
- berry/pomegranate + hibiscus
- mint/chlorella + matcha
- Salish sea/blue spirulina
- loving lavender
- ..get creative!

DIRECTIONS
-
- Place main ingredients into the blender and blend on high until emulsified, about 30sec – 1min. This is best done with a high-speed blender but careful not to overland/cook – see notes below.
- If you are using the optional ingredients (not the flavouring ingredients yet), add those into the blender and repeat step one.
- From here, you can keep it whole, thick and creamy the way it is or strain it through a cheesecloth for a smoother finish.
- If you are flavouring the mylk, add in the flavouring ingredients after you’ve strained the mylk. Put ingredients back into the blender and do a quick blend to mix them all together.
- Store in the fridge for 1 week or freeze any extra in small ice cube trays for quick future use.
- Place main ingredients into the blender and blend on high until emulsified, about 30sec – 1min. This is best done with a high-speed blender but careful not to overland/cook – see notes below.

NOTES
-
- INSULIN LEVELS – I gentle reminder to those using ONLY oats in your homemade mylks: Oats are still a simple carbohydrate meaning they are BEST paired with high quality fats and protein (likes nuts and seeds!) so that we can help to avoid insulin spikes and mid-day crashes. Be mindful of this when using sugars, flavours and different ingredients to prepare your mylks!
- THICKNESS – start with 1/2 cup and slowly add more as you blend to attain the proper thickness. I find about 2/3 cup is the perfect spot for me! If i’m using the mylk in cooking such as sauces, breakfast/granola, baking etc. I will make a thicker mylk (1 full cup) and not strain it. However, if I’m using it in tea/coffee or beverages, I will keep it a bit thinner (1/2 cup – 2/3 cup) and strain it.
- SOAKING – soak the oats or nuts FIRST before using to get a creamier texture and to help avoid separation. This may also help with digestion, absorption and removing any unwanted chemicals. Ideally soak with cold water for 12hrs or warm water for 1 – 2 hrs. Discard excess water & rinse before using.
- BLENDING – The longer you blend, the smoother it will be however, over-blending can cause the blender to heat up and cook the mylk! Be mindful of this as it could get too thick and “clumpy”. Opt for blending it in 30sec – 1min intervals, allowing it to cool in-between to avoid this. This also protects the oils + valuable nutrients from getting altered or damaged!
- FLAVOURING – Be careful not to add TOO much flavour! I usually start with 1/8 or 1/4 tsp for the stronger tasting flavours like spirulina and only about 1tsp of the milder tasting flavours cacao. I personally find that they don’t alter the flavour of the mylk that much either though. However, I don’t add a lot and I primarily do it for the gorgeous colours and small added benefits! Play around with the quantities to find what works best for you – and let me know what flavours you try!!
- QUALITY – as always, aim for quality vs quantity! At-home mylks can be simple, affordable and nutrient-dense (who says you can’t have it all?!) when done with quality ingredients! If you don’t have a water filter, consider looking at options (or ask me what filter I would recommend for you) and buy non-GMO or organic, raw hemp hearts. I like to buy mine in bulk from these different outlets!
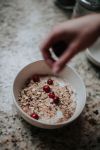
- BREAKFAST – add or use in any of these breakfast recipes!
- HEMP MYLK RECIPE
DID YOU KNOW
I also offer meal prepping services? Let me help! PLUS I’ll be adding an online shop to my website soon- Contact me to inquire or pre-order.
With love,
Heidi MacAulay, R.H.N.
“Eat more plants. Do more yoga. Read more books.”
Learn more about me, my credentials or how to work with me here!

One Reply to “”